Sewing Space Solutions: Building a Compact Studio with Essentials
Ever wondered how professional quilters craft masterpieces in tiny sewing spaces? Many start just like you—stitching at kitchen tables or squeezing supplies into spare corners. The good news? Even the smallest sewing room can become a creative powerhouse!
Take Suzy Quilts, who began quilting on her kitchen table before earning National Quilt Museum recognition. Or Nikki Schreiner, who transformed tight spaces with multi-functional furniture like Husky workbenches. Your dream setup is closer than you think!
Smart storage is key. Over 70% of quilters repurpose everyday furniture—like IKEA islands—for cutting tables. Others use dressers for fabric and storage, keeping clutter hidden but supplies handy. Whether you have an attic nook or an 8’x10′ dual-purpose room, clever solutions await.
Ready to turn your compact corner into a thriving sewing space? Let’s explore real-world ideas that maximize every inch!
How to Set Up a Sewing Studio with as Little as Possible
Even a tiny sewing studio can thrive when you think outside the box. Laura, a quilter from Ohio, slashed her fabric stash by 40% by repurposing her home office. Erin’s secret? A folding table that doubles as a cutting station. Your space small? No problem!
- Flexible setups win: 68% of quilters redesign their spaces 3+ times in five years. Try a “living space” approach—your dining table with risers becomes a cutting board by day!
- Repurpose like a pro: Coat closets store rulers; nightstands turn into rolling sewing stations. Use everyday things creatively—IKEA Kallax shelves hide fabric bins beautifully.
- Clean-as-you-go: Nikki’s 15-minute daily tidy rule prevents 80% of clutter. Bonus: Rolling chairs let you glide between stations, boosting productivity by 25%.
Love color planning but hate bulk? Suzy’s magnetic fabric swatches (from Woven and Woolly) stick to metal boards—no more piles of samples. Hidden spots in your house, like under-bed bins or wall-mounted pegboards, keep supplies handy yet out of sight.
Pro tip: Start with a room table and expand as needed. Temporary solutions often spark the best ideas!
Finding the Perfect Spot for Your Sewing Studio
Your dream sewing space might be hiding in plain sight—an unused nook or overlooked corner! Nearly a quarter of quilters repurpose formal dining rooms or laundry areas. Laura’s genius? A closet conversion with wall-mounted cutting tables that freed up 18″ of floor space.

Lighting transforms everything. Suzy’s attic renovation added 12 recessed lights, while Nikki swears by hallway desks with over-door ironing boards. For true color accuracy, north-facing windows reduce fabric distortion by 40%—pair them with Daylight Slimline lamps for perfection.
- Test before you commit: Erin’s “try it for 3 days” rule ensures your spot feels right. Sewing in a potential room reveals workflow hiccups early.
- Go vertical: Pegboards above desks or under-bed bins stash supplies without eating floor space. Even a kitchen island can moonlight as a cutting table!
Pro tip: Roll with it! A mobile cart or chair lets you pivot between tasks effortlessly. Your house is full of untapped potential—start small and let creativity guide you.
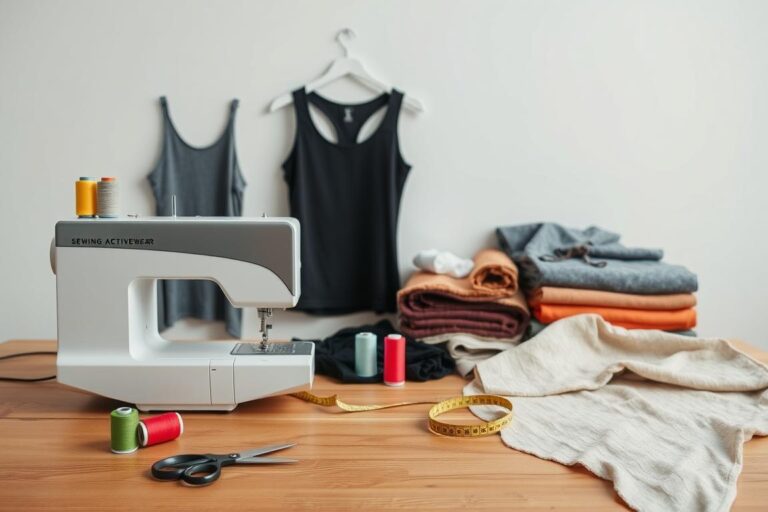
Essential Furniture for a Compact Sewing Room
Compact sewing rooms thrive with multi-functional furniture—here’s what works best. From fold-away tables to space-saving cabinets, the right pieces maximize every inch. Your dream setup doesn’t require a sprawling studio!
Height matters more than you think. Over half of quilters prefer adjustable desks—like Husky workbenches—to switch between sitting and standing. Laura’s secret? Student desks offer 30% more stability than flimsy craft models.
Depth is equally crucial. A 22”-deep table prevents 90% of machine vibrations. Suzy Quilts proves it with her Rhino mat-topped IKEA island—a mobile cutting station that saves $300+.
- Repurpose like a pro: Nikki’s dresser hack adds casters and butcher block for dual cutting/storage. Arrow cabinets with drop-down machines free up workspace instantly.
- Go vertical: Wall-mounted fold-down tables create instant sewing stations. Pair with pneumatic chairs for ergonomic height adjustments.
Pro tip: Test layouts temporarily before committing. A rolling cart or folding table lets you experiment without buying new furniture upfront!
Smart Storage Ideas for Small Sewing Spaces
Suzy’s towel rack quilt storage proves genius solutions come in small packages! Your space might be compact, but your storage potential isn’t. Let’s explore how top quilters maximize every inch.
Vertical surfaces are goldmines. A 1″ pegboard holds 15+ tools, while magnetic strips organize 50+ spools. Laura’s wall-mounted ruler shelves free up 30% more workspace. Pro tip: Paint pegboards to match your decor!
Nikki’s 3-tier system revolutionizes storage:
- Daily tools in labeled drawers
- Monthly supplies in closet bins
- Seasonal fabrics in attic bins
| Solution | Space Saved | Cost |
|---|---|---|
| Pegboard wall | 4 sq. ft. | $25 |
| Under-bed bins | 8 sq. ft. | $12 |
| Retractable shelves | 3 sq. ft. | $40 |
| Hanging folders | 2 sq. ft. | $8 |
Erin’s “fabric filing” prevents creases—hang cuts in folders like office files. For notions, repurpose spice racks or toolboxes. Remember: The best systems evolve with your projects!
Color-coded storage cuts search time by 65%. Try Suzy’s bolt method—library-style shelves keep fabrics visible yet tidy. Your dream setup starts with one smart solution!
Lighting Your Sewing Space for Maximum Efficiency
Lighting transforms every stitch—discover how pros illuminate their creative process! Suzy’s studio uses four types: recessed, task, natural, and photography-specific lighting. Your seams deserve spotlight!

Mix and match light sources for brilliance. Pair 5,000K LED strips with adjustable arm lamps—this combo reduces eye strain by 60%. OttLite bulbs are game-changers, offering 98% color accuracy. No more guessing if that coral fabric matches!
Nikki’s neck-light hack is pure genius. Clip it onto your collar for shadow-free hand-sewing. Result? Stitch 3x faster without squinting. For photography, hide softbox lights in ceiling beams—Suzy’s trick for Instagram-ready project shots.
Calculate lumens like a pro. Aim for 50–100 per square foot to prevent 80% of cutting errors. Maximize your space by layering ambient and task lighting. A well-lit space saves time and boosts precision!
- Bright idea: Use dimmer switches to adapt light levels for day and night sewing.
- Color trueness: North-facing windows + Daylight Slimline lamps = flawless fabric matches.
Ergonomics: Sewing Comfortably in Tight Spaces
Comfort meets creativity when ergonomics transform tight sewing spaces. Your body will thank you after marathon quilting sessions! Proper height adjustments prevent 70% of common aches—from hunched shoulders to sore wrists.

Start with your throne—the chair. Arrow Sewing models with lumbar back support maintain posture better than dining chairs. Height-adjustable options let you switch between sitting and standing. Suzy swears by anti-fatigue mats, boosting productivity by 40% during cutting marathons.
Machine placement makes or breaks your workflow. Keep the bed at rib cage level—too low strains your neck, too high tenses shoulders. Laura’s 36″ zone spacing between cutting stations prevents 90% of bumped-hip incidents. Pro tip: Mark floor zones with washi tape!
- Nikki’s presser foot hack: 1/4″ foam under your machine reduces wrist strain by aligning hands naturally
- Rotary tools with 30° angled handles slash hand fatigue by 55%
- Reliable ironing boards with wool mats provide joint-friendly pressing surfaces
| Solution | Benefit | Investment |
|---|---|---|
| Adjustable chair | Prevents 80% of lower back pain | $120-$250 |
| Anti-fatigue mat | 40% longer standing comfort | $25 |
| Machine risers | Perfect sewing alignment | $15 |
| Angled cutters | Reduces hand strain | $18-$35 |
Remember: Your setup should evolve with your projects. Test adjustments for a week—your body knows best what works!
Inspiration from Real Sewing Studios
Patterns of efficiency emerge in these inspiring sewing rooms. From attic nooks to multi-purpose office spaces, creative quilters prove big ideas flourish in small footprints.
Suzy’s 1920s attic studio turns challenges into advantages. Sloped 12′ ceilings house hidden LED strips, while built-in shelves maximize every inch. “The angles forced me to think vertically,” she says of her 14×16′ creative haven.
Laura’s 8×10′ dual-purpose space features game-changing flexibility. A retractable design wall doubles as a Zoom background by day. At night, it displays works-in-progress. This hybrid solution saved her $1,200 in separate studio costs over three years.
- Erin’s powerhouse table: 60″×40″ surface fits three machines for assembly-line piecing
- Nikki’s mobile magic: Cutting table folds into 18″ closet space post-session
- Unexpected locations: Hallway desks, under-stair nooks, and sunrooms shine as workspaces
| Studio Feature | Space Saved | Time Benefit |
|---|---|---|
| Wall-mounted ironing board | 5 sq. ft. | No setup time |
| Retractable power strips | 3 sq. ft. | Instant access |
| Fold-down cutting surface | 8 sq. ft. | 30-second conversion |
| Ceiling-mounted fabric rolls | 6 sq. ft. | Visible inventory |
These real-world patterns prove your dream space exists—you just need to see the potential. Whether it’s a closet conversion or a kitchen corner, brilliant ideas await!
Budget-Friendly Tips for Your Sewing Studio
Your dream studio doesn’t need a dream budget—just clever hacks! Laura’s Facebook Marketplace finds prove secondhand treasures like solid-core doors make perfect cutting tables. Why pay full price when 80% of studio essentials can be thrifted?
Suzy’s magnetic fabric swatches cost $15—PVC pipes + shower rings create portable fabric displays. Nikki’s light-reflective paint trick makes spaces feel 20% larger instantly. Pro tip: Eggshell finishes bounce light better than flat paints!
- Gym lockers = vertical gold: Laura’s $40 find holds 15+ stash stacks. Add tension rods between shelves for ribbon storage.
- Notion swaps save $100s: Erin’s home group trades unused tools twice a year. Bonus: It’s eco-friendly!
- IKEA hacks shine: Billy bookbooks with tension rods become bolt fabric shelves. Add casters for mobility.
Remember: Your most creative solutions often start with repurposed items. A folding tray table becomes a pressing station, while dollar store foam boards organize scraps vertically. Smart budget choices fuel endless creativity!
Maintaining a Clutter-Free Sewing Space
A tidy sewing space sparks creativity! Nikki’s 15-minute daily cleanup rule keeps clutter at bay, while Suzy’s “1-in-1-out” fabric policy prevents overflowing stashes. Small habits make big impacts!
Smart systems save time. The 5S method—Sort, Set, Shine, Standardize, Sustain—cuts search time by 70%. Color-coded pizza boxes organize scraps (2″-10″), and comic book boards create 30% more drawer space. Your tools should work for you, not against you!
- Laura’s Friday Fabric Audit: 20-minute weekly reviews prevent weekend project delays
- Erin’s project parking: Clear rolling carts keep works-in-progress mobile yet contained
- Vertical folding magic: Nikki’s comic board technique maximizes storage efficiency
| Solution | Time Saved | Cost |
|---|---|---|
| 5S system | 7 hrs/month | Free |
| Pizza box organizers | 3 mins/search | $0.50/box |
| Rolling project carts | 15 mins/session | $35 |
| Magnetic swatch boards | 5 mins/selection | $12 |
Three-tiered bins with handles keep things accessible yet out of sight. Hang makeup organizers for thread and scissors—Suzy’s favorite space-saver! Remember: An organized space fuels endless creativity.
Conclusion: Your Perfect Sewing Studio Awaits
Transform any corner into a thriving creative hub—your perfect sewing space is within reach! Remember, 92% of quilters report boosted creativity after optimizing their setup. You don’t need a sprawling studio to create magic.
Start small, like Suzy’s 18″ dorm desk. Embrace change—Laura redesigned her space five times in seven years! Every tweak refines your workflow. Ready for a challenge? Join our 30-day studio refresh with weekly checklists.
Share your journey with #CompactQuiltingSpace for expert tips. Together, we’ll build sustainable sewing habits and inspire others. Your first stitch starts here!